
How to Open and Edit SVG Files in Canva 2024: Complete NiceSVG Guide - Part 1
Understanding SVG Files and Canva Compatibility
Scalable Vector Graphics (SVG) files have become essential for modern digital design, offering crisp, scalable graphics that maintain quality at any size. As of 2024, Canva has significantly enhanced its SVG support, making it easier than ever to work with vector graphics within the platform. This comprehensive NiceSVG guide will walk you through everything you need to know about opening and editing SVG files in Canva.
SVG files are particularly valuable because they remain sharp at any resolution, making them perfect for logos, icons, and graphics that need to work across multiple platforms and sizes. Unlike raster images that pixelate when enlarged, SVG files maintain their crisp edges and smooth curves regardless of scaling.
Getting Started: Preparing Your SVG Files
Before diving into Canva, it's important to ensure your SVG files are properly formatted and optimized for the platform. Canva works best with clean, well-structured SVG files that don't contain excessive complexity or unsupported elements.
When preparing your SVG files for Canva, consider the following factors: file size should ideally be under 25MB for optimal performance, avoid embedded fonts that may not render correctly, and ensure your SVG doesn't contain JavaScript or external references that Canva cannot process.
Step-by-Step Guide: Opening SVG Files in Canva
Opening SVG files in Canva is a straightforward process that begins with accessing the upload functionality. Here's your complete step-by-step guide to get started:
The upload process in Canva has been streamlined to accommodate various file types, with SVG files receiving special treatment to preserve their vector properties. Once you navigate to the Uploads section, you'll find multiple options for adding your SVG files to your design workspace.
It's worth noting that Canva automatically processes uploaded SVG files to ensure compatibility with their editing environment. This processing may take a few moments for complex files, but the result is a fully editable vector graphic that integrates seamlessly with Canva's design tools.
Understanding Canva's SVG Editing Capabilities
While Canva offers robust SVG support, it's important to understand the platform's editing capabilities and limitations. Canva functions as a user-friendly design tool rather than a comprehensive vector editor like Adobe Illustrator or Inkscape. This means you can perform essential editing tasks while working within certain constraints.
Canva excels at basic SVG manipulations including resizing, repositioning, color changes, and transparency adjustments. These capabilities make it perfect for incorporating SVG elements into larger designs, creating social media graphics, or preparing marketing materials that require scalable vector elements.
Basic SVG Editing Techniques in Canva
Once your SVG file is successfully uploaded to Canva, you can begin editing using the platform's intuitive tools. The editing process focuses on practical modifications that enhance your design workflow without requiring advanced vector editing knowledge.
Color modification is one of the most frequently used editing features for SVG files in Canva. The platform allows you to change fill colors, adjust transparency levels, and apply various color effects to match your design requirements. This flexibility makes it easy to adapt existing SVG graphics to fit your brand colors or design theme.
Common Questions About SVG Files in Canva
As you begin working with SVG files in Canva, several questions commonly arise regarding compatibility, editing limitations, and best practices. Understanding these aspects will help you make the most of Canva's SVG functionality.
The most important thing to remember is that Canva treats SVG files as editable objects while maintaining their vector properties. This means you can scale them infinitely without quality loss, but complex path editing or node manipulation isn't available within Canva's interface.
Advanced SVG Editing Techniques in Canva
While Canva provides excellent basic SVG editing capabilities, mastering advanced techniques will help you create professional-quality designs. Understanding these methods ensures you can maximize your SVG files' potential within Canva's ecosystem.
Working with Complex SVG Elements
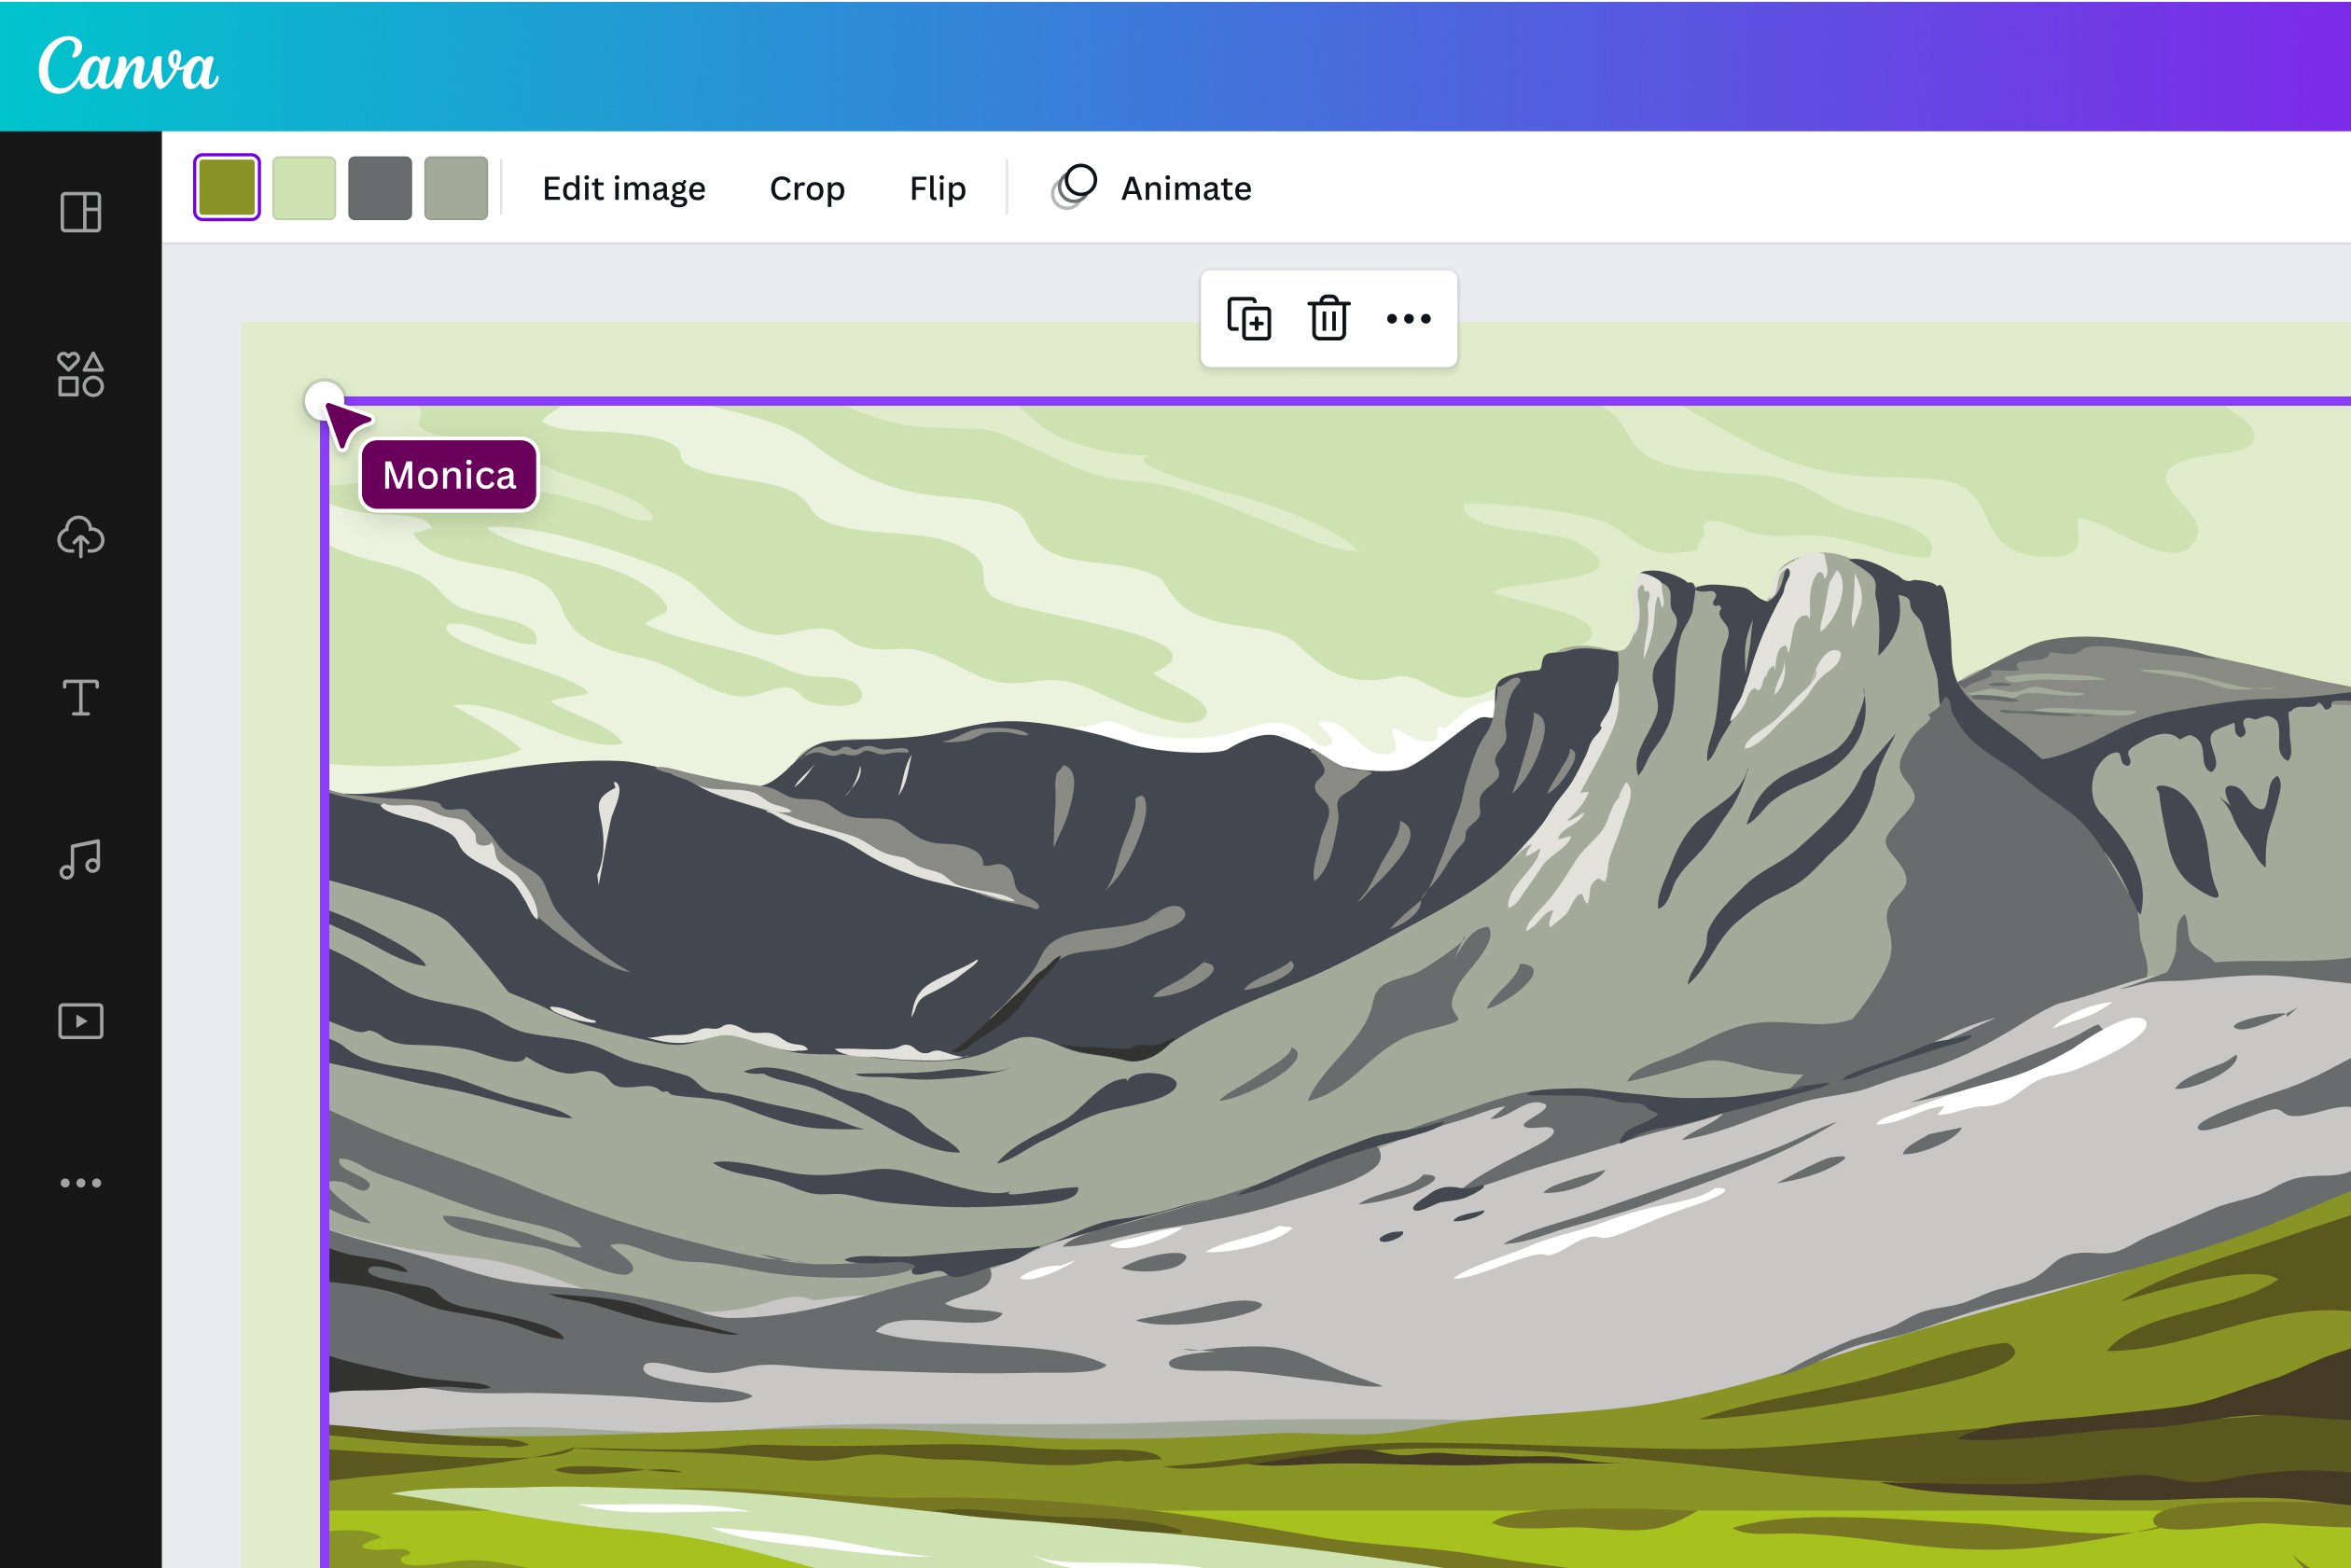
When you open SVG files in Canva that contain multiple elements or layers, the platform automatically recognizes individual components. This allows you to select and edit specific parts of your SVG without affecting the entire graphic. To edit individual elements, simply click on the specific part you want to modify. Canva will highlight the selected element, enabling you to change colors, apply effects, or adjust opacity levels.
For SVG files with text elements, Canva maintains the text's editability in most cases. You can modify font styles, sizes, and colors directly within the platform. However, if the text has been converted to paths in the original SVG file, it will be treated as a graphic element rather than editable text.
Optimizing SVG Performance in Canva
To ensure smooth editing and optimal performance when working with SVG files in Canva, consider the file complexity and size. Large SVG files with numerous elements may slow down the editing process. Before uploading, review your SVG files and simplify unnecessary elements using dedicated vector editing software if needed.
Canva works best with SVG files under 25MB in size. If your SVG file exceeds this limit, consider optimizing it using SVG compression tools or removing redundant elements. This optimization process ensures faster loading times and smoother editing experiences within Canva's interface.
Troubleshooting Common SVG Issues
Occasionally, you may encounter issues when attempting to open SVG files in Canva. Common problems include unsupported SVG features, embedded fonts, or complex animations. If an SVG file fails to upload or display correctly, try opening it in a vector editing program first to identify and resolve compatibility issues.
Some SVG files created with specific software may contain proprietary elements that Canva cannot interpret. In such cases, save the file in a more universal SVG format or remove incompatible features before uploading to Canva.
Best Practices for SVG Workflow
Establishing an efficient workflow for working with SVG files in Canva significantly improves your design productivity. Start by organizing your SVG files in clearly labeled folders within Canva's upload section. This organization system helps you quickly locate specific graphics when working on multiple projects.
When editing SVG files, make incremental changes and regularly save your progress. Canva automatically saves your work, but creating duplicate versions of important designs provides additional security for your projects. Consider creating template designs with commonly used SVG elements to streamline future projects.
Frequently Asked Questions
Maximizing Your NiceSVG Resources
NiceSVG provides an extensive library of high-quality SVG files specifically optimized for Canva compatibility. When selecting SVG files from the NiceSVG collection, you can be confident that they will work seamlessly within Canva's editing environment. These files are pre-tested for compatibility and optimized for performance, ensuring a smooth editing experience.
Take advantage of NiceSVG's categorized collections to find SVG files that match your specific design needs. Whether you're creating business graphics, social media content, or print materials, the organized library structure helps you locate appropriate SVG resources quickly and efficiently.
No comments yet. Be the first to share your thoughts!